
Restoring and painting wagon wheels has become a popular DIY project. Whether you’re working on wooden wagon wheels or an old wagon, you can breathe new life into them with modern tools. In 2025, advanced materials make it easier to apply paint on a 100-year-old wagon while ensuring a professional restoration.
Preparing Your Wagon Wheels
Before you dive into painting wagon wheels, you need to prepare them properly. This step ensures the paint adheres well and lasts for years. Let’s break it down into a few simple steps.
Cleaning the Surface Thoroughly
Start by cleaning the wheels to remove dirt, grease, and grime. A clean surface is essential for a smooth finish. Depending on the level of contamination, you can choose from different types of cleaners:
| Type of Cleaner | Description |
|---|---|
| Acid | Powerful for tough contamination; removes brake dust and rust stains but should be used cautiously. |
| Acid-Free | Safer for the environment and health; effective but generally less powerful than acid cleaners. |
| D-Limonene | A natural cleaner derived from citrus; environmentally friendly and effective for cleaning. |
For most DIY projects, acid-free or D-Limonene cleaners are great options. Use a brush or sponge to scrub the surface, then rinse thoroughly with water. Let the wheels dry completely before moving on.
Sanding for Better Paint Adhesion
Sanding helps the paint stick better by creating a slightly rough surface. Use sandpaper with the right grit for the job:
- Coarse grits (40-80) are perfect for removing rust or old paint.
- Medium grits (100-220) smooth out rough areas and minor imperfections.
- Fine grits (320-400) prepare the surface for primer and ensure proper paint adhesion.
For wagon wheels, start with medium grit to smooth the surface, then finish with fine grit for the best results.
Dismantling Components (if Necessary)
If your wagon wheels have removable parts, consider dismantling them. This makes it easier to clean, sand, and paint each component thoroughly. For example, you might want to separate the metal rim from the wooden spokes. Label the parts to avoid confusion during reassembly.
Applying Primer to Prevent Rust
Primer is your best friend when it comes to protecting wagon wheels from rust and ensuring a long-lasting finish. Choose a primer designed for the material of your wheels—metal or wood. Apply a thin, even coat and let it dry completely before painting. This step not only prevents rust but also enhances the vibrancy of the paint.
By following these steps, you’ll set yourself up for success in your DIY project. Proper preparation is the key to achieving a professional-looking result when painting wagon wheels.
Selecting the Best Materials for Painting Wagon Wheels
Choosing Modern Paints and Primers
Picking the right paint and primer is crucial for a successful project. You’ll want to consider a few factors before making your choice:
- Type of Paint: Enamel paints are highly durable, while acrylic paints are easier to apply and clean up.
- Color: Test the shade you like to ensure it complements your wagon’s overall look.
- Finish: Decide between glossy, semi-gloss, or matte, depending on the style you’re aiming for.
- Size of the Can: If you’re painting multiple wheels, go for a larger can to avoid running out mid-project.
For primers, choose one that matches the material of your wagon wheels. A metal primer prevents rust, while a wood primer seals the surface for smooth paint application.
Tools for Precise and Efficient Application
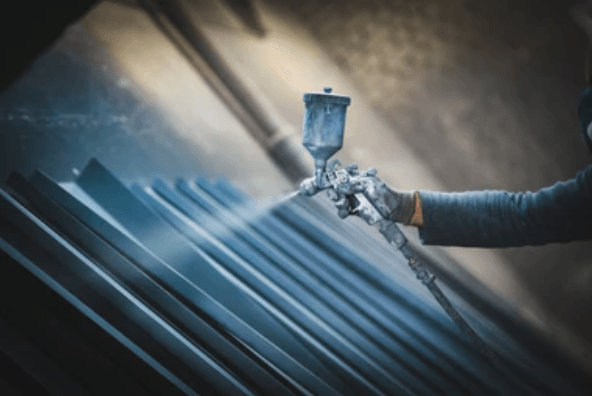
Using the right tools makes painting wagon wheels easier and more precise. A high-quality paintbrush works well for detailed areas, while a foam roller ensures even coverage on larger surfaces. If you’re looking for speed, try a spray gun. It applies paint evenly and saves time, especially for intricate designs. Don’t forget painter’s tape to protect areas you don’t want painted, like tires or metal rims.
Eco-Friendly and Long-Lasting Options
Eco-friendly paints are a fantastic choice for your DIY project. They’re made from natural ingredients and don’t contain harmful VOCs, making them safer for you and the environment. These paints often last longer than traditional ones, resisting fading and staining over time. Some brands even offer lifetime warranties, so you won’t need to repaint as often. By choosing eco-friendly options, you’ll create a beautiful finish while reducing your environmental impact.
Painting Techniques for Wagon Wheels

Applying Paint in Thin, Even Coats
When it’s time to start painting, thin, even coats are the way to go. Thick layers can lead to drips and uneven coverage, so take your time. Use smooth, sweeping motions to apply the paint. Keep the spray can or brush moving steadily to avoid buildup in one spot. After each coat, let it dry completely before adding the next. This prevents smudging and ensures a flawless finish. For an extra-smooth surface, lightly sand between coats. It might feel like an extra step, but it makes a big difference in the final look.
Using Circular Motions for a Smooth Finish
Circular motions can help you achieve a professional finish, especially on rounded surfaces like wagon wheels. If you’re using a brush, move it in small, overlapping circles to spread the paint evenly. For spray painting, rotate the wheel as you spray to maintain consistent coverage. This technique minimizes streaks and creates a smooth, polished appearance. It’s a simple trick, but it works wonders for curved surfaces.
Protecting Tires and Metal Parts During Painting
Before you start painting, protect the parts you don’t want painted. Use painter’s tape to cover the tires and any exposed metal components. You can also use plastic sheets or old newspapers to shield larger areas. This keeps your work neat and saves you from cleaning up accidental splatters later. Taking a few minutes to prep these areas will make your DIY project look more polished and professional.
Finishing Touches for a Professional Look
Sealing the Paint for Durability
Sealing your wagon wheels after painting is a must if you want them to last. A good sealant protects the paint and the material underneath. It keeps wood from soaking up liquids, which can make the fibers swell. This swelling actually tightens the wheel, making it stronger and more durable. Sealants like polyurethane outdoor porch floor paint also shield the wheels from harsh weather, dirt, and wear. Apply a thin, even coat of sealant after the paint has dried completely. Let it cure for the recommended time to ensure maximum protection. This step locks in your hard work and keeps your wheels looking fresh for years.
Adding Custom Designs or Patterns
Why stop at just painting? Adding custom designs can make your wagon wheels stand out. You can choose from a variety of creative ideas to match your style. Here are some fun options:
| Design Idea | Description |
|---|---|
| Unfinished wooden wagon wheel shapes | Customizable shapes available for painting to match personal color palettes. |
| Seasonal motifs | Ideas for incorporating festive themes using small flower girl wedding wagons. |
| Scenic bases with natural materials | Suggestions for creating scenic designs using natural elements. |
Get creative! Use stencils for clean lines or freehand your designs for a personal touch. Whether you go for bold patterns or subtle accents, custom designs add character to your project.
Maintenance Tips to Preserve the Finish
Once your wagon wheels are painted and sealed, a little maintenance goes a long way. Keep them clean by wiping off dirt and dust regularly with a soft cloth. If they’re exposed to the elements, check for chips or cracks in the paint. Touch up any damaged areas quickly to prevent further wear. For wooden wheels, reapply sealant every couple of years to maintain their durability. Store your wheels in a dry place when not in use to protect them from moisture. These simple steps will keep your wheels looking great and ensure your hard work pays off.
Painting wagon wheels can be a rewarding project when you follow the right steps. Start with proper preparation, choose quality materials, and apply modern techniques like thin coats and smooth motions. You’ll create durable, charming pieces that add rustic elegance to any space. With these tips, you’re ready to transform your wheels confidently!
FAQ
How long should I wait between paint coats?
You should wait 1-2 hours between coats. This allows the paint to dry properly and prevents smudging or uneven layers.
Can I use regular house paint for wagon wheels?
No, regular house paint isn’t durable enough. Use enamel or acrylic paints designed for outdoor use to ensure a long-lasting finish.
What’s the best way to remove old paint from wagon wheels?
Use a paint stripper or sanding. Paint strippers work faster, but sanding gives you more control and prepares the surface for new paint.
Related Blog
Understanding the Importance of Steel Wagon Wheels in Agricultural and Off-Road Vehicles