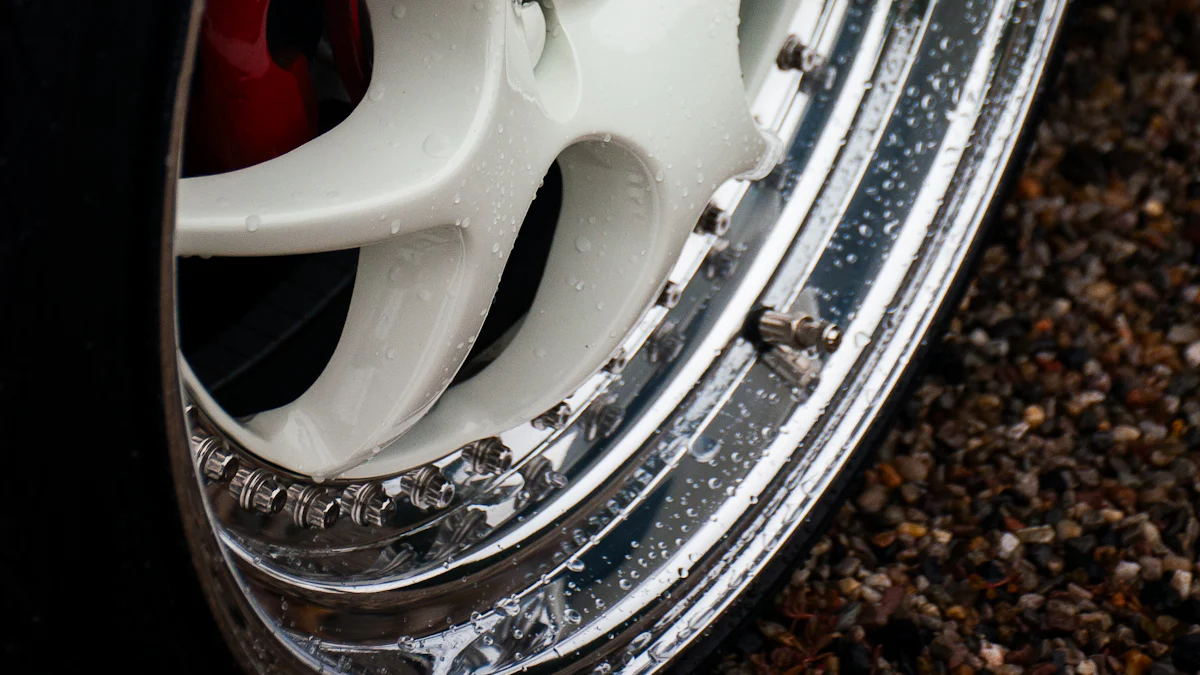
Transforming your car’s look can be as simple as giving your wheels a fresh coat of white paint. A set of white painted wheels not only enhances the aesthetic appeal but also adds a clean, modern touch to your vehicle. You don’t need to be a professional to achieve this. With the right tools and a bit of patience, you can paint your wheels at home and enjoy the satisfaction of a job well done. Whether your wheels are worn or you’re just ready for a change, this project is both rewarding and fun.
Step 1: Preparing the Workspace and Tools for White Painted Wheels
Setting Up a Safe and Clean Workspace
Creating the right workspace is the first step to achieving a flawless finish on your wheels. You need a space that is well-ventilated and free from dust or debris. A garage or an outdoor area with a protective cover works best. If you’re working outdoors, choose a day with mild weather to avoid issues like wind blowing dust onto your freshly painted wheels.
Lay down a tarp or plastic sheet to protect the ground and catch any overspray. This keeps your workspace clean and prevents paint from staining surfaces. Ensure you have adequate lighting to see every detail of your work. Good visibility helps you spot imperfections during the process. Safety is also key—wear a mask to avoid inhaling fumes and gloves to protect your hands from chemicals.
Pro Tip: Use painter’s tape to mark off areas around your workspace that you want to keep paint-free. This adds an extra layer of protection and keeps things tidy.
Gathering the Necessary Tools and Materials
Having the right tools and materials on hand makes the process smoother and more efficient. Here’s what you’ll need:
- Cleaning Supplies: Start with a degreaser or wheel cleaner to remove dirt, grease, and grime. Products like Klean Strip Prep All are excellent for cleaning between coats.
- Sanding Tools: Use a wire brush to remove rust and old paint. For a smoother surface, sand the wheels with 300 grit sandpaper, followed by 500 grit sandpaper. This ensures the paint adheres properly and leaves a smooth finish.
- Primer: An etchable primer is essential for creating a strong base. Apply 2-3 coats, allowing each coat to dry for about 30 minutes. This step improves paint adhesion and durability.
- White Paint: Choose a high-quality spray paint designed for wheels. Look for brands that offer durability and resistance to chipping.
- Clear Coat: A clear coat adds a protective layer, preventing scratches and corrosion. It also gives your wheels a glossy, professional look.
- Masking Tape and Plastic Bags: Use these to cover areas you don’t want to paint, such as the tire or lug nut holes.
- Protective Gear: Don’t forget gloves, a mask, and safety goggles to keep yourself safe throughout the process.
Organize your tools and materials before you begin. This saves time and ensures you don’t miss any crucial steps. With your workspace ready and tools in place, you’re all set to move on to the next step in transforming your wheels.
Step 2: Cleaning and Sanding the Wheels for a Smooth Finish
Cleaning the Wheels Thoroughly
Before you start painting, you need to clean your wheels thoroughly. Dirt, grease, and grime can prevent the paint from sticking properly, so this step is crucial. Begin by using a high-quality wheel cleaner or degreaser. Spray the cleaner generously over the entire surface of the wheel, making sure to reach into all the nooks and crannies. Let it sit for a few minutes to break down stubborn dirt.
Next, grab a stiff-bristled brush or a sponge and scrub the wheels. Pay extra attention to areas with built-up grime or brake dust. Rinse the wheels with water to wash away the cleaner and any loosened debris. If you notice any remaining spots, repeat the process until the wheels are spotless. Dry them completely with a clean microfiber cloth to avoid water spots.
Pro Tip: Use a tack rag after cleaning to pick up any fine dust or particles left behind. This ensures a perfectly clean surface for the next step.
Sanding for Proper Paint Adhesion
Sanding is the key to achieving a smooth finish and ensuring the paint adheres properly. Start with 300 grit sandpaper to remove any old paint, rust, or imperfections on the wheel’s surface. Work in small sections, applying even pressure as you sand. This step creates a rough texture that helps the primer bond to the wheel.
Once you’ve completed the initial sanding, switch to 500 grit sandpaper. This finer grit smooths out the surface and eliminates any coarse scratches left by the previous sanding. Make sure to sand every part of the wheel, including the edges and hard-to-reach areas. A smooth and even surface is essential for a professional-looking finish.
After sanding, wipe down the wheels with a damp cloth to remove dust and debris. Let them dry completely before moving on to the next step. Skipping this step can lead to uneven paint application or peeling later on.
Scientific Research Findings: Studies show that sanding with progressively finer grits, such as 300 and 500 grit sandpaper, removes imperfections and prepares the surface for optimal paint adhesion. This process also helps prevent rust from forming under the paint.
By taking the time to focus on sanding and cleaning your wheels, you’re setting the foundation for a flawless paint job. These steps might seem tedious, but they make all the difference in achieving a durable and professional finish.
Step 3: Masking and Protecting the Wheels Before You Paint
Masking Off Areas You Don’t Want to Paint
Before priming and painting your wheels, you need to protect the areas that shouldn’t get painted. This step ensures a clean and professional finish. Start by using high-quality masking tape to cover the tire edges, lug nut holes, and valve stems. For larger areas like the tires, plastic bags or sheets work perfectly. Slip the bag over the tire and secure it with tape along the rim’s edge. This keeps the paint from accidentally spraying onto the rubber.
Take your time during this step. Proper masking prevents overspray and saves you from tedious cleanup later. Make sure the tape adheres firmly to the surface. Loose edges can allow paint to seep through, ruining the clean lines you’re aiming for. Double-check your work before moving on to the next step.
Pro Tip: Use painter’s tape instead of regular tape. It peels off easily without leaving sticky residue, making the process smoother.
Applying Primer for Better Paint Adhesion
Priming is a crucial part of masking and preparing your wheels for paint. A good primer creates a strong base for the paint to stick to, ensuring durability and a smooth finish. Choose a high-quality primer designed for automotive use, such as an etchable or self-etching primer. These primers bond well to metal surfaces and help prevent rust.
Shake the primer can vigorously for about a minute to mix the contents thoroughly. Hold the can about 8-10 inches away from the wheel and apply the primer in light, even coats. Avoid heavy spraying, as it can cause drips or uneven coverage. Allow each coat to dry for about 20-30 minutes before applying the next one. Typically, 2-3 coats are enough to create a solid base.
Product Highlight: Consider using Dupli-Color Wheel Coating for its high-performance acrylic-enamel formula. It pairs well with primers and ensures a durable finish.
Once the primer has dried completely, inspect the surface for any imperfections. If you notice rough spots, lightly sand them with fine-grit sandpaper (around 1000 grit) and wipe the surface clean. This step ensures the paint adheres smoothly and evenly.
Pro Tip: For a brilliant finish, pair your primer with a top-tier white paint like EASTUP Premium Pure White Wheel Paint. Its quick-drying and fade-resistant properties make it an excellent choice for priming and painting your wheels.
By carefully masking and preparing your wheels for paint, you’re setting the stage for a flawless finish. These steps might take some time, but the effort pays off when you see the professional results.
Step 4: Painting Your Wheels with Precision
Applying the White Paint in Even Coats
Now comes the exciting part—applying the white paint to your wheels. This step transforms your hard work into a stunning visual upgrade. Start by shaking the spray paint can vigorously for at least one minute. This ensures the paint mixes evenly, giving you a smooth and consistent application.
Hold the can about 8-10 inches away from the wheel. Spray in light, even strokes, moving side to side. Avoid holding the can in one spot for too long, as this can cause drips or uneven coverage. Begin with a thin coat to create a base layer. Let it dry for about 10-15 minutes before applying the next coat. Patience is key here—rushing can lead to imperfections.
Apply 3-4 coats of paint, allowing each layer to dry completely before adding the next. This builds up a solid, vibrant color that looks professional and lasts longer. Pay attention to the edges and hard-to-reach areas, ensuring every part of the wheel gets covered. If you notice any uneven spots, lightly sand them with fine-grit sandpaper before applying another coat.
Expert Tip: According to automotive painting experts, using an automotive-quality 2K Urethane paint system provides the best results. This type of paint offers excellent durability and a high-gloss finish, making it ideal for white painted wheels.
Once you’ve applied the final coat, let the paint cure for at least an hour before moving on to the next step. This ensures the paint sets properly and prevents smudging or peeling.
Sealing the Paint with a Clear Coat
To protect your freshly painted wheels and give them a glossy, professional finish, you need to seal the paint with a clear coat. A clear coat acts as a shield, guarding against scratches, chips, and environmental damage. It also enhances the shine, making your white painted wheels stand out.
Shake the clear coat can thoroughly before use. Hold it 8-10 inches away from the wheel and apply in the same light, even strokes you used for the paint. Start with a thin layer to avoid drips. Allow it to dry for about 10-15 minutes, then apply 2-3 additional coats for maximum protection. Each layer should dry completely before the next one.
Pro Tip: Avoid using traditional wax or silicone-based products on fresh paint. These can trap moisture, leading to bubbling or cloudiness in the finish. Let the clear coat cure fully before applying any protective products.
After applying the final coat, let the wheels sit undisturbed for at least 24 hours. This curing time allows the clear coat to harden, ensuring a durable and long-lasting finish. Once cured, your wheels will have a sleek, polished look that rivals a professional paint job.
By following these steps, you’ll achieve a flawless finish that not only looks great but also stands up to daily wear and tear. Your white painted wheels will transform your car’s appearance, giving it a clean and modern edge.
Step 5: Finishing Touches for Professional White Painted Wheels
Inspecting and Touching Up the Wheels
Before calling your project complete, take a moment to inspect your wheels closely. Look for any uneven paint spots, drips, or areas where coverage might be thin. A well-lit workspace helps you spot imperfections more easily. If you notice any flaws, don’t worry—touching them up is simple.
For small imperfections, use fine-grit sandpaper (around 1000 grit) to smooth out the area gently. Wipe away any dust with a tack rag before applying a light coat of paint to the affected spot. Let it dry completely before adding another layer if needed. This step ensures a seamless finish that looks polished and professional.
Pro Tip: Keep a small amount of leftover paint handy for future touch-ups. Storing it in a cool, dry place ensures it stays usable for minor fixes down the road.
Once you’re satisfied with the paint job, give the wheels a final inspection. Double-check that all areas are evenly coated and free from blemishes. Taking the time to perfect these details makes a big difference in the overall result.
Reinstalling the Wheels Safely
After your wheels are painted and fully cured, it’s time to reinstall them on your car. Safety should be your top priority during this step. Start by carefully removing any masking tape or plastic bags you used to protect the tires and other parts. Peel the tape slowly to avoid damaging the fresh paint.
Next, align the wheels with the hub and secure them using the lug nuts. Tighten the lug nuts in a crisscross pattern to ensure even pressure. This method prevents the wheel from sitting unevenly on the hub. Use a torque wrench to tighten the lug nuts to the manufacturer’s recommended specifications. Over-tightening or under-tightening can lead to safety issues, so follow the guidelines closely.
Safety Reminder: After driving for about 50 miles, recheck the lug nuts to ensure they remain tight. This step adds an extra layer of safety and peace of mind.
Reinstalling the wheels properly not only keeps you safe but also protects your hard work. A secure fit ensures your freshly painted wheels stay in great condition as you hit the road.
Polishing for a Glossy, Professional Finish
The final step in your wheel transformation is polishing. Polishing enhances the shine of your wheels and gives them that showroom-quality finish. Start by choosing a non-abrasive polish designed for automotive use. Avoid products with harsh chemicals that could damage the clear coat.
Apply a small amount of polish to a clean microfiber cloth. Work it into the surface of the wheel using circular motions. Focus on one section at a time to ensure even coverage. Once you’ve applied the polish, use a separate clean cloth to buff the wheel to a high shine. This step removes any residue and brings out the glossy finish.
Expert Tip: For an extra layer of protection, consider applying a wheel sealant after polishing. Sealants create a barrier against dirt, brake dust, and environmental elements, keeping your wheels looking pristine for longer.
Take a step back and admire your work. The polished finish not only looks stunning but also reflects the effort you’ve put into this project. Your white painted wheels are now ready to turn heads wherever you go.
By following these finishing touches, you ensure your wheels look as good as they perform. These final steps bring your project full circle, leaving you with a result that’s both durable and visually striking.
Painting your wheels white is a fantastic way to refresh your car’s look while adding a modern, clean touch. By following these five steps, you can achieve a professional finish without breaking the bank. This DIY project not only saves money but also gives you the freedom to customize your car’s appearance. To maintain the stunning results, consider protecting your painted wheels with a ceramic wheel coating. It shields against brake dust and environmental damage, keeping them looking fresh for longer. Start your project today and enjoy the pride of transforming your car with your own hands!
FAQ
How durable are white painted wheels?
White painted wheels can be highly durable when you follow the proper preparation and painting steps. Using high-quality materials like automotive-grade spray paint and clear coat ensures a finish that resists chipping, peeling, and flaking. These coatings also protect against brake dust and corrosion, keeping your wheels looking fresh for a long time. Regular cleaning and occasional touch-ups will help maintain their appearance.
Quick Tip: Applying a ceramic wheel coating after painting adds an extra layer of protection, making your wheels even more resistant to wear and tear.
Will the paint hold up against daily driving conditions?
Yes, if you prepare the wheels correctly and use the right products, the paint will withstand daily driving conditions. A good primer and multiple layers of paint and clear coat create a strong bond that resists cracking and peeling. This finish can handle exposure to road debris, weather, and brake dust. However, avoid harsh chemicals or abrasive cleaners, as they can damage the paint over time.
How do I clean white painted wheels without damaging them?
Use a gentle, non-abrasive wheel cleaner or a mixture of mild soap and water. Avoid harsh chemicals or acidic cleaners, as they can strip the paint or clear coat. A soft-bristled brush works well for removing dirt and brake dust without scratching the surface. After cleaning, rinse thoroughly and dry with a microfiber cloth to prevent water spots.
Pro Tip: Regular cleaning prevents brake dust buildup, which can stain white wheels if left untreated.
Can I paint my wheels without removing them from the car?
While it’s possible, removing the wheels is highly recommended for the best results. Painting wheels while they’re still on the car makes it harder to achieve even coverage and increases the risk of overspray on other parts of the vehicle. Removing the wheels allows you to work on a flat surface and ensures a cleaner, more professional finish.
How long does the entire painting process take?
The process typically takes 2-3 days, depending on drying times between coats. Cleaning and sanding the wheels can take a few hours. Each coat of primer, paint, and clear coat needs time to dry—usually 20-30 minutes between coats and at least 24 hours for the final clear coat to cure. Patience is key to achieving a durable and professional-looking finish.
How many coats of paint and clear coat should I apply?
For the best results, apply 3-4 thin coats of white paint and 2-3 coats of clear coat. Thin, even layers prevent drips and ensure a smooth finish. Allow each coat to dry completely before applying the next one. This layering technique creates a vibrant color and a durable protective barrier.
What tools and materials are essential for painting wheels?
Here’s a quick checklist of what you’ll need:
- Degreaser or wheel cleaner
- Sandpaper (300 grit and 500 grit)
- Masking tape and plastic bags
- Automotive-grade primer, white paint, and clear coat
- Tack rag for removing fine dust
- Safety gear (mask, gloves, and goggles)
Having these tools ready before you start ensures a smoother process and better results.
Can I use regular spray paint instead of automotive-grade paint?
Automotive-grade spray paint is strongly recommended. It’s designed to withstand the heat, friction, and exposure that wheels endure. Regular spray paint may not adhere as well or last as long, leading to peeling or chipping. Investing in high-quality paint ensures a finish that looks great and holds up over time.
How do I fix imperfections in the paint after it dries?
If you notice imperfections like drips or uneven spots, lightly sand the area with fine-grit sandpaper (around 1000 grit). Wipe away any dust with a tack rag, then apply a thin coat of paint to the affected area. Let it dry completely before adding another layer if needed. This method helps you achieve a seamless finish.
Do white painted wheels require extra maintenance?
White wheels tend to show dirt and brake dust more than darker colors, so regular cleaning is essential. Use a gentle cleaner and soft brush to keep them looking their best. Applying a wheel sealant or ceramic coating adds extra protection, making them easier to clean and less prone to staining.
Final Thought: With proper care, your white painted wheels will stay vibrant and stylish, enhancing your car’s overall look.