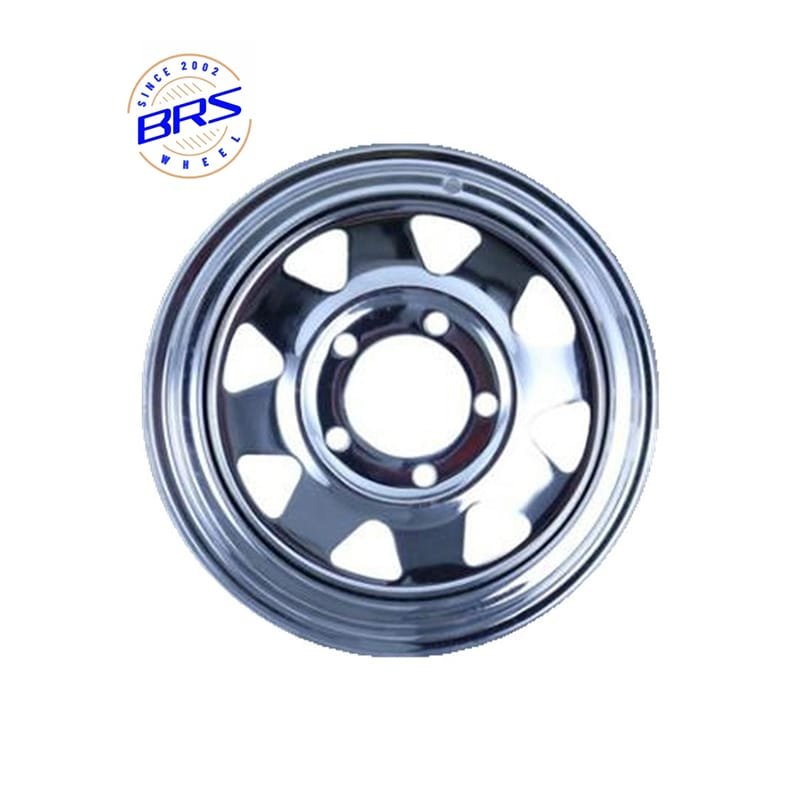
Das Aussehen Ihres Fahrzeugs zu verändern, kann so einfach sein, wie Ihren Stahlrädern einen neuen Anstrich in Silber zu geben. Diese Veränderung verbessert nicht nur die Ästhetik, sondern bietet auch eine Schutzschicht gegen Rost und Verschleiß. Stellen Sie sich vor, Sie fahren mit diesen glänzenden, silber lackierte Stahlräder die alle Blicke auf sich ziehen. Es ist ein unkompliziertes Heimwerkerprojekt, das Ihrem Fahrzeug sowohl Schönheit als auch Haltbarkeit verleiht. Warum also nicht Ihren Rädern die Auffrischung geben, die sie verdienen?
Wichtigste Erkenntnisse
- Verändern Sie das Aussehen Ihres Fahrzeugs durch die silberne Lackierung von Stahlrädern, die sowohl die Ästhetik als auch den Schutz vor Rost verbessert.
- Richtiges Vorbereiten der Räder durch Reinigen und Schleifen, um die Haftung der Farbe und eine glatte Oberfläche zu gewährleisten.
- Verwenden Sie hochwertige Ätz- und Füllergrundierungen, um eine solide Grundlage für die Farbe zu schaffen und ein professionelles Aussehen zu gewährleisten.
- Tragen Sie die Silberfarbe in dünnen, gleichmäßigen Schichten auf und lassen Sie jede Schicht vollständig trocknen, um ein dauerhaftes und leuchtendes Finish zu erzielen.
- Versiegeln Sie Ihre lackierten Räder mit einem Klarlack, um den Lack zu schützen und seine Langlebigkeit und seinen Glanz zu verbessern.
- Bauen Sie immer die Räder von Ihrem Fahrzeug ab, um den Zugang zu erleichtern und eine gründlichere Lackierung zu ermöglichen.
- Seien Sie geduldig und lassen Sie ausreichend Zeit zum Trocknen, bevor Sie die Räder wieder montieren, um eine Beschädigung des frischen Lacks zu vermeiden.
Vorbereitung
Um Ihre Stahlfelgen für einen neuen Anstrich in Silber vorzubereiten, sind einige wesentliche Schritte. Die richtige Vorbereitung sorgt dafür, dass der Lack gut haftet und länger hält, so dass Ihre Räder das gewünschte atemberaubende Aussehen erhalten.
Reinigung der Räder
Entfernen Sie die Räder vom Fahrzeug.
Beginnen Sie mit der sicheren Demontage der Räder von Ihrem Fahrzeug. So können Sie bequemer arbeiten und alle Bereiche erreichen, die gereinigt und lackiert werden müssen.Gründlich mit Wasser und Seife reinigen, um Schmutz und Fett zu entfernen.
Verwenden Sie einen hochwertigen Felgenreiniger oder eine einfache Mischung aus Seife und Wasser, um Schmutz, Fett oder Bremsstaub zu entfernen. Produkte wie Auto-Radreiniger-Sprays sind hervorragend geeignet, um hartnäckige Verschmutzungen und Eisenablagerungen ohne großen Aufwand zu lösen. Für eine gründlichere Reinigung können Sie Folgendes verwenden PPG's DX 579 Metall-ReinigerDer Reiniger ist wirksam, wenn er mit Wasser verdünnt und mit einem Scotch Brite-Pad aufgetragen wird. Denken Sie daran, Gummihandschuhe zu tragen, da dieser Reiniger ätzend ist. Eine saubere Oberfläche ist wichtig, damit die Farbe richtig haftet.
Schleifen der Räder
Verwenden Sie Schleifpapier der Körnung 400, um Rost zu entfernen und eine glatte Oberfläche zu schaffen.
Sobald die Räder sauber sind, können Sie sie abschleifen. Verwenden Sie Schleifpapier der Körnung 400, um die Oberfläche vorsichtig abzuschleifen. Dieser Schritt entfernt jeglichen Rost und schafft eine glatte Oberfläche, auf der die Grundierung und der Lack haften können. Das Abschleifen hilft auch dabei, Unebenheiten zu beseitigen, die das endgültige Aussehen Ihrer silber lackierten Stahlräder beeinträchtigen könnten.Mit einem sauberen Tuch abwischen, um Staub zu entfernen.
Wischen Sie nach dem Schleifen mit einem sauberen Tuch den Staub und die Rückstände auf den Rädern ab. Dadurch wird sichergestellt, dass keine Partikel den Lackiervorgang beeinträchtigen. Eine saubere, staubfreie Oberfläche ist der Schlüssel zu einem professionellen Finish.
Wenn Sie diese Vorbereitungsschritte befolgen, schaffen Sie die Voraussetzungen für ein erfolgreiches Lackierprojekt. Ihre Räder werden nicht nur fantastisch aussehen, sondern auch eine haltbare Oberfläche die den Elementen standhalten.
Grundierung
Die Grundierung Ihrer Räder ist ein entscheidender Schritt, um das glatte, silberne Finish zu erzielen. Sie sorgt dafür, dass die Farbe richtig haftet und bietet eine glatte Grundlage für den Decklack. Im Folgenden erfahren Sie, wie Sie Ihre Felgen grundieren, um sie für die Lackierung vorzubereiten.
Auftragen der Ätzgrundierung
Wählen Sie eine für Metalloberflächen geeignete Ätzgrundierung.
Die Wahl der richtigen Grundierung ist entscheidend. Dupli-Color Selbstätzende Grundierung ist eine großartige Wahl, weil sie das blanke Metall in einem Schritt ätzt und grundiert. Diese Grundierung wurde speziell für Autoprojekte entwickelt und gewährleistet maximale Haftung auf verschiedenen Oberflächen. Sie bereitet das Metall vor, so dass die Farbe gut haften kann.Tragen Sie eine leichte Schicht auf und lassen Sie sie vollständig trocknen.
Wenn Sie Ihre Grundierung ausgewählt haben, tragen Sie eine leichte, gleichmäßige Schicht auf das gesamte Rad auf. Achten Sie darauf, dass Sie alle Bereiche abdecken, aber vermeiden Sie einen dicken Auftrag, um Tropfen zu vermeiden. Lassen Sie die Grundierung vollständig trocknen, bevor Sie mit dem nächsten Schritt fortfahren. Diese Trocknungszeit ist wichtig, damit sich die Grundierung mit der Metalloberfläche verbinden kann und die Voraussetzungen für eine makellose Oberfläche geschaffen werden.
Auftragen der Spachtelgrundierung
Verwenden Sie eine Spachtelgrundierung, um Unebenheiten auszugleichen.
Nachdem die Ätzgrundierung getrocknet ist, ist es an der Zeit, alle verbleibenden Oberflächenmängel zu beseitigen. A Füllergrundierung ist perfekt für diese Aufgabe. Es füllt Rillen und kleinere Unebenheiten auf und schafft eine einheitliche Oberfläche. Dieser Schritt ist entscheidend für das professionelle Aussehen Ihrer silber lackierten Stahlfelgen.Nach dem Trocknen leicht anschleifen, um eine glatte Oberfläche zu erhalten.
Sobald die Füllergrundierung trocken ist, schleifen Sie die Oberfläche mit feinem Schleifpapier leicht an. Dieser Schritt glättet alle Unebenheiten und bereitet das Rad auf die abschließende Lackierung vor. Ein sanftes Anschleifen sorgt dafür, dass die Farbe gleichmäßig haftet, was zu einer beeindruckenden, dauerhaften Oberfläche führt.
Wenn Sie diese Schritte zur Grundierung befolgen, sind Sie auf dem besten Weg, Ihre Felgen zu verschönern. Eine ordnungsgemäße Grundierung verbessert nicht nur das Aussehen, sondern verlängert auch die Lebensdauer Ihrer Lackierung, sodass die Räder immer frisch und neu aussehen.
Malerei

Jetzt, wo Ihre Räder grundiert und fertig sind, ist es an der Zeit, sie mit einer atemberaubenden Silberlackierung zum Leben zu erwecken. In der Malerei liegt die Magie und verwandelt Ihre Räder in einen Blickfang für Ihr Fahrzeug.
Die Wahl der richtigen Farbe
Wählen Sie eine hochwertige Silberfarbe konzipiert für Metall.
Die Wahl der richtigen Farbe ist entscheidend für ein professionelles Erscheinungsbild. Entscheiden Sie sich für eine hochwertige Silberfarbe, die speziell für Metalloberflächen geeignet ist. EASTUP Premium Glitzerndes Silber Metallic-Felgenfarbe ist eine ausgezeichnete Wahl. Es bietet ein brillantes Finish, hohe Haltbarkeit und Lichtechtheit, so dass Ihre Räder lange Zeit fantastisch aussehen.Für ein gleichmäßiges Auftragen sollten Sie einen Sprühlack verwenden.
Sprühfarbe sorgt für einen gleichmäßigen Auftrag, was für eine glatte Oberfläche unerlässlich ist. Sie ermöglicht es, die gesamte Oberfläche zu bedecken, ohne Pinselspuren zu hinterlassen. Produkte wie Wurth German Alloy Silber Felgenfarbe sind perfekt für diese Aufgabe. Sie trocknen schnell und bieten eine dauerhafte, hochglänzende Oberfläche, die Ihre silber lackierten Stahlfelgen zur Geltung bringt.
Auftragen der Farbe
In leichten, gleichmäßigen Schichten auftragen, um Tropfen zu vermeiden.
Verwenden Sie beim Auftragen der Farbe leichte, gleichmäßige Schichten. Diese Technik verhindert Tropfen und sorgt für ein gleichmäßiges Aussehen. Halten Sie die Sprühdose in einem gleichmäßigen Abstand zum Rad und bewegen Sie sie gleichmäßig über die Oberfläche. Geduld ist hier der Schlüssel; Eile kann zu einer ungleichmäßigen Abdeckung führen.Lassen Sie jede Schicht trocknen, bevor Sie die nächste auftragen.
Lassen Sie jede Schicht vollständig trocknen, bevor Sie die nächste Schicht auftragen. Dieser Schritt ist entscheidend für den Aufbau einer starken, dauerhaften Oberfläche. In der Regel ist es sinnvoll, zwischen den einzelnen Anstrichen etwa 30 Minuten zu warten. Die besten Ergebnisse erzielen Sie, wenn Sie zwei bis drei Schichten auftragen, damit der Lack richtig aushärten kann. Diese Methode sorgt dafür, dass Ihre silber lackierten Stahlfelgen eine lang anhaltende, lebendige Oberfläche erhalten.
Wenn Sie diese Lackierschritte befolgen, erzielen Sie einen eleganten, professionellen Look, der das Erscheinungsbild Ihres Fahrzeugs aufwertet. Ihre silbern lackierten Stahlfelgen sehen nicht nur fantastisch aus, sondern überstehen auch den Test der Zeit und halten Ihr Fahrzeug stilvoll und geschützt.
Fertigstellung
Sie haben die letzten Schritte erreicht, um Ihre Räder in atemberaubende silber lackierte Stahlräder zu verwandeln. In diesem Abschnitt erfahren Sie, wie Sie den Lack versiegeln und die Räder wieder montieren, um eine dauerhafte und professionelles Finish.
Versiegeln mit Lack
Verwenden Sie einen Klarlack, um den Lack schützen.
Um das glänzende Silber zu erhalten, tragen Sie einen Klarlack auf. Wurth Glanz-Klarlack-Sprühfarbe ist eine ausgezeichnete Wahl für diese Aufgabe. Es trocknet schnell zu einer dauerhaften, kristallklaren, hochglänzenden Oberfläche, die Ihren Rädern Tiefe und Glanz verleiht. Stellen Sie vor dem Auftragen sicher, dass die Oberfläche trocken, sauber und frei von Fett oder Öl ist. Dieser Schritt ist entscheidend, damit der Lack richtig haftet und den Lack schützt.Für zusätzliche Haltbarkeit mehrere Schichten auftragen.
Die besten Ergebnisse erzielen Sie, wenn Sie 2 bis 3 leichte Anstriche Lack auftragen und zwischen den einzelnen Schichten etwa 30 Minuten warten. Diese Methode gewährleistet eine starke Schutzschicht, die die Langlebigkeit Ihrer Lackierung erhöht. Das Auftragen mehrerer Schichten erhöht nicht nur die Haltbarkeit, sondern verleiht Ihren Rädern auch ein poliertes, professionelles Aussehen. Um optimale Ergebnisse zu erzielen, sollten Sie bei Temperaturen zwischen 70 und 90 Grad Celsius arbeiten.
Wiedereinbau der Räder
Stellen Sie sicher, dass die Farbe vollständig getrocknet ist, bevor Sie sie wieder anbringen.
Bevor Sie die Räder wieder an Ihr Fahrzeug montieren, vergewissern Sie sich, dass der Lack vollständig getrocknet ist. Wenn Sie diesen Schritt überstürzen, kann dies zu Flecken oder Schäden am frischen Lack führen. Hier zahlt sich Geduld aus, damit Ihre harte Arbeit zu einem makellosen Ergebnis führt.Ziehen Sie die Radmuttern fest an.
Sobald die Farbe getrocknet ist, montieren Sie die Räder vorsichtig wieder auf Ihr Fahrzeug. Ziehen Sie die Radmuttern mit einem Drehmomentschlüssel fest an. Dieser Schritt ist wichtig für die Sicherheit und gewährleistet, dass die Räder während der Fahrt fest sitzen. Überprüfen Sie jede einzelne Radmutter, um sicherzugehen, dass sie alle gemäß den Herstellerangaben angezogen sind.
Wenn Sie diese letzten Schritte befolgen, ist die Umgestaltung Ihrer Räder abgeschlossen. Ihre silbern lackierten Stahlfelgen sehen nicht nur fantastisch aus, sondern halten auch den Elementen stand und sorgen dafür, dass Ihr Fahrzeug über Jahre hinweg stilvoll und geschützt bleibt.
Das Lackieren Ihrer Stahlfelgen in Silber ist ein lohnendes Heimwerkerprojekt, das das Aussehen Ihres Fahrzeugs verändern kann. Wenn Sie diese Schritte befolgen, erhalten Sie ein professionelles und dauerhaftes Finish. Der Prozess ist einfach und erlaubt Ihnen Wählen Sie Ihre bevorzugte Farbe und sie bei Bedarf sogar austauschen. Viele haben festgestellt, dass das Aufarbeiten von Rädern mit Sprühdosen und ein bisschen Ellenbogenfett einfach und zufriedenstellend ist. Denken Sie daran, dass Sie in einem gut belüfteter Raum aufgrund der Abgase. Genießen Sie das frische, neue Aussehen Ihrer silbern lackierten Stahlräder und den zusätzlichen Schutz, den sie vor den Elementen bieten.
FAQ
Wie lange dauert es, bis die Farbe vollständig getrocknet ist?
Die Trocknungszeit für Farbe kann je nach Art der Farbe und den Umgebungsbedingungen variieren. Normalerweise sollte jede Farbschicht innerhalb von 30 Minuten trocknen. Um eine vollständige Aushärtung zu erreichen, sollten Sie die Farbe jedoch mindestens 24 Stunden lang trocknen lassen, bevor Sie die Räder anfassen oder wieder montieren. Dadurch wird sichergestellt, dass die Farbe vollständig ausgehärtet ist und eine dauerhafte Oberfläche bildet.
Kann ich jede Art von Silberfarbe für meine Stahlfelgen verwenden?
Sie sollten eine hochwertige Silberfarbe verwenden, die speziell für Metalloberflächen entwickelt wurde. Haushaltsübliche Farben haften möglicherweise nicht gut und halten der Abnutzung, die Räder erfahren, nicht stand. Marken wie Rust-Oleum und Dupli-Color bieten Lacke an, die speziell für die Verwendung in Fahrzeugen entwickelt wurden und eine bessere Haftung und Haltbarkeit gewährleisten.
Muss ich die Räder von meinem Fahrzeug abnehmen, um sie zu lackieren?
Ja, es wird empfohlen, die Räder von Ihrem Fahrzeug abzunehmen. So haben Sie Zugang zu allen Bereichen des Rades und können den Lack gleichmäßiger und gründlicher auftragen. Außerdem wird so Overspray auf anderen Teilen des Fahrzeugs vermieden.
Ist es notwendig, nach der Lackierung einen Klarlack aufzutragen?
Das Auftragen eines Klarlacks ist sehr empfehlenswert. Er wirkt wie eine Schutzschicht, die die Haltbarkeit des Lacks erhöht und für ein glänzendes Finish sorgt. Der Lack schützt vor Absplitterungen, Kratzern und Umwelteinflüssen und sorgt dafür, dass Ihre Räder frisch und neu aussehen.
Was sollte ich tun, wenn ich vor der Lackierung Rost an meinen Rädern feststelle?
Wenn Sie Rost entdecken, sollten Sie ihn vor dem Anstrich beseitigen. Verwenden Sie Schleifpapier der Körnung 400, um den Rost zu entfernen und eine glatte Oberfläche zu schaffen. Dieser Schritt ist von entscheidender Bedeutung, da das Überstreichen von Rost zu schlechter Haftung und einer weniger haltbaren Oberfläche führen kann. Eine rostfreie Oberfläche sorgt dafür, dass die Farbe besser haftet und länger hält.
Kann ich meine Räder bei kaltem Wetter lackieren?
Das Streichen bei kaltem Wetter ist nicht ideal. Die besten Ergebnisse erzielen Sie bei Temperaturen zwischen 70 und 90 Grad Celsius. Kalte Temperaturen können die Trocknungszeit und die Haftung der Farbe beeinträchtigen. Wenn Sie bei kühleren Temperaturen streichen müssen, stellen Sie sicher, dass der Raum gut belüftet ist, und erwägen Sie die Verwendung eines Heizgeräts, um eine angemessene Temperatur aufrechtzuerhalten.
Wie kann ich vermeiden, dass die Farbe beim Auftragen tropft?
Um Tropfen zu vermeiden, tragen Sie die Farbe in leichten, gleichmäßigen Schichten auf. Halten Sie die Sprühdose in gleichmäßigem Abstand zum Rad und bewegen Sie sie gleichmäßig über die Oberfläche. Geduld ist der Schlüssel; Eile kann zu ungleichmäßigem Auftrag und Tropfen führen. Lassen Sie jede Schicht trocknen, bevor Sie die nächste auftragen, um ein glattes, professionelles Finish zu erzielen.
Ist es sicher, sofort nach dem Wiedereinbau lackierter Räder zu fahren?
Sie sollten warten, bis der Lack vollständig ausgehärtet ist, bevor Sie fahren. Auch wenn sich der Lack nach ein paar Stunden trocken anfühlt, dauert es mindestens 24 Stunden, bis er vollständig ausgehärtet ist. Zu frühes Fahren kann zu Flecken oder Beschädigungen des frischen Lacks führen und das Finish beeinträchtigen.
Kann ich die Farbe meiner Räder nachträglich ändern?
Ja, Sie können die Farbe Ihrer Räder später ändern. Befolgen Sie einfach dieselben Schritte zur Vorbereitung, Grundierung und Lackierung, die in dieser Anleitung beschrieben sind. Vergewissern Sie sich, dass der aktuelle Lack in gutem Zustand ist, oder schleifen Sie ihn ab, um eine glatte Oberfläche für die neue Farbe zu schaffen. Diese Flexibilität ermöglicht es Ihnen, das Aussehen Ihres Fahrzeugs jederzeit aufzufrischen.