
Glänzend verwandeln Chrom-Räder in glattes, mattes oder glänzendes Schwarz kann das Aussehen Ihres Fahrzeugs komplett auffrischen. Ganz gleich, ob Sie einen unauffälligen Straßenstil oder einen robusten Offroad-Look anstreben, die Lackierung Ihrer Räder ist ein erschwingliches DIY-Upgrade. In dieser Schritt-für-Schritt-Anleitung erfahren Sie, wie Sie Chromfelgen wie ein Profi schwarz lackieren können.
Schritt 1: Sammeln Sie Ihre Materialien
Bevor Sie beginnen, vergewissern Sie sich, dass Sie alles haben, was Sie brauchen:
- Schwarzer Radlack (Urethan oder Hochtemperatur-Emaille)
- Selbst-ätzende Grundierung formuliert für Metall
- Schleifpapier (320er- und 600er-Körnung)
- Reinigungsmittel (Entfetter oder Isopropylalkohol)
- Abdeckband und Papier zum Schutz von Reifen und Bremsen
- Falltuch aus Kunststoff oder großer Karton
- Fangvorrichtung: Nitrilhandschuhe, Staubmaske, Schutzbrille
Profi-Tipp: Wählen Sie einen hochwertigen Felgenlack mit UV-Schutz, um ein Verblassen und Abplatzen mit der Zeit zu verhindern.
Schritt 2: Entfernen oder Abdecken der Räder
Für optimale Ergebnisse haben Sie zwei Möglichkeiten:
- Entfernen Sie die Räder aus dem Fahrzeug. So haben Sie vollen Zugang und Ihr Fahrzeug ist vor Overspray geschützt.
- Maske an Ort und Stelle wenn der Ausbau nicht möglich ist. Decken Sie den Reifen, den Bremssattel und den umliegenden Kotflügel mit Malerband und Papier ab.
Legen Sie jedes Rad auf eine Plastikunterlage oder einen Karton, um überschüssige Farbe und Grundierung aufzufangen.
Schritt 3: Reinigen und Entfetten
Chromoberflächen haben oft Wachs, Straßenschmutz oder Bremsstaub, die verhindern, dass Grundierung und Farbe richtig haften.
- Spray a starker Entfetter über die Radfläche und den Lauf.
- Mit einer Nylonbürste oder einem Scotch-Brite-Pad schrubben.
- Gründlich mit Wasser abspülen und vollständig trocknen.
- Abwischen mit Isopropylalkohol für ein abschließendes Abwischen.
Zurückbleibende Rückstände können dazu führen, dass die Farbe später abblättert, also lassen Sie sich bei diesem Schritt Zeit.
Schritt 4: Schleifen der Chromoberfläche
Chrom ist extrem glatt, daher ist das Aufrauen der Oberfläche entscheidend:
- Beginnen Sie mit Schleifpapier mit 320er Körnung um die glänzende Oberfläche zu entfernen.
- Schleifen Sie jedes Chromteil leicht an, bis es ein stumpfes, mattes Aussehen annimmt.
- Wechseln zu 600er-Körnung für ein feineres Finish, das eine bessere Haftung der Grundierung ermöglicht.
- Nach dem Schleifen den Staub mit Druckluft abblasen oder mit einem Staubtuch abwischen.
Schritt 5: Selbstätzende Grundierung auftragen
Eine selbstätzende Grundierung verbindet sich chemisch mit dem Metall und gewährleistet eine lang anhaltende Haftung:
- Schütteln Sie die Grundierungsdose mindestens 2 Minuten lang.
- Halten Sie die Dose 8-10 Zoll vom Rad nehmen und einsprühen gleichmäßige, schwungvolle Pässe.
- Bewerbung zwei leichte AnstricheZwischen den einzelnen Anstrichen 5-10 Minuten warten.
- Lassen Sie den Primer mindestens eine Woche lang aushärten. 30 Minuten (siehe Dosenanleitung).
Vermeiden Sie schwere Mäntel, die zu Tropfen und Auslaufen führen können.
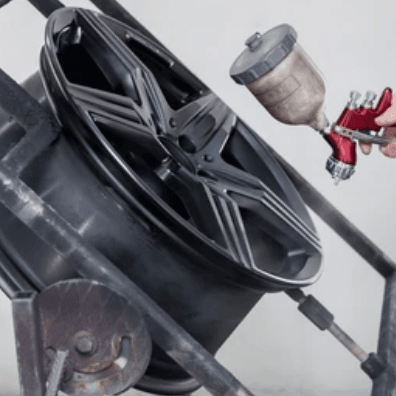
Schritt 6: Lackieren mit schwarzer Felgenfarbe
Sie können wählen mattes, satiniert, oder Glanz nach Ihrem Stil zu gestalten:
- Schütteln Sie die schwarze Radlackdose 2-3 Minuten lang.
- Bewerbung drei leichte Anstricheund halten Sie die Düse in Bewegung, um Ablagerungen zu vermeiden.
- Behalten Sie den gleichen Abstand von 8-10 Zoll bei und überlappen Sie jeden Durchgang um etwa 50%.
- Lassen Sie jede Schicht 10-15 Minuten trocknen, bevor Sie die nächste auftragen. Für beste Haltbarkeit, erlauben eine Endaushärtung von 24 Stunden vor der Handhabung.
Tipp: Wenn Sie einen professionellen Anstrich bevorzugen, verwenden Sie eine Spritzpistole mit Kompressor und Autolack für ein gleichmäßiges Ergebnis.
Schritt 7: Fertigstellung und Schutz
Für zusätzliche Strapazierfähigkeit und Glanz (wenn Sie sich für Glanz entschieden haben):
- Nachdem die schwarze Farbe ausgehärtet ist, tragen Sie eine Klarlack konzipiert für Räder.
- Spray zwei leichte Anstricheund warten Sie 10 Minuten zwischen den Anwendungen.
- Lassen Sie den Klarlack trocknen für 24 Stunden bevor Sie wieder aufsteigen oder fahren.
Der Klarlack sorgt für UV-Beständigkeit und schützt vor Absplitterungen durch Straßenschmutz.
Tipps zur Wartung
- Regelmäßig waschen mit einem pH-ausgeglichenen Felgenreiniger, um ein Verätzen durch Bremsstaub zu vermeiden.
- Vermeiden Sie scharfe Chemikalien-Halten Sie sich an milde Seifen und weiche Bürsten.
- Jährliche Inspektion auf Absplitterungen oder Kratzer und bessern Sie diese umgehend aus, um Korrosion zu vermeiden.
Schlussfolgerung
Malerei Chromräder schwarz ist ein leicht durchführbares Wochenendprojekt, das beeindruckende Ergebnisse liefert. Wenn Sie Ihr Fahrzeug sorgfältig vorbereiten, grundieren und Qualitätsprodukte auftragen, erhalten Sie eine atemberaubende, langlebige Oberfläche, die das Aussehen Ihres Fahrzeugs aufwertet. Sind Sie bereit, loszulegen? Packen Sie Ihr Werkzeug ein, räumen Sie Ihren Arbeitsplatz frei und genießen Sie die Verwandlung!